To stop a bike chain from falling off, I’ve learned that regular maintenance and proper adjustment are key. First, I ensure that the chain is the right length and the derailleur is correctly aligned. If the chain is too long or the derailleur is misaligned, it can lead to slippage. I also regularly check the tension of the chain; a chain that’s too loose can easily come off.
Cleaning and lubricating the chain are also crucial steps. A dirty or rusty chain is more prone to slipping off the gears. Additionally, I make sure the gears are in good condition. Worn or bent teeth on the chainrings or cassette can cause the chain to slip off. If these steps don’t solve the issue, I consult a professional mechanic.
Sometimes the problem might be due to a worn-out chain or gears, which need replacement. Regular checks and maintenance keep my bike in good shape and minimize the chances of the chain falling off.
So how do I fix a skipping chain or clicking bike chain myself?
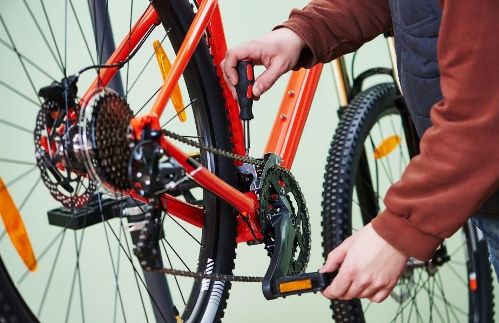
Look carefully at where the chain is slipping
As mentioned, a chain drop on a bicycle can happen in different places and fixing the problem; you do differently for each setup where it slips off. Here are various places you can check to help you fix your chain drop problem.
If the chain drop of the chainset in the front, you need to make sure the two screws found on the front derailleur are adequately adjusted.
The one limit screws sometimes marked with an H standing for high and limits the movement of your front derailleur cage to move outwards.
While the other screws sometimes have an L for low to limit the inwards movement of the front derailleur cage. Here you need to check which side the chain comes off.
Suppose you find it coming off on the inside of the chainset you need to adjust the low screw. Place the chain on the smallest chainring with the largest gear at the back.
The inner plate should nearly touch the chain with a gap of up to 2mm. If you find the opening more prominent, then turn the low screw in a clockwise position towards the inner plate to get it close to the chain.
However, if the chain comes off on the outside of the chainset, then the high screw needs adjusting. Place the chain on the largest chainring upfront with the smallest gear at the back.
As with the lower screw, the outside plate of the front derailleur cage must barely touch the chain. Furthermore, if the gap is more extensive than 2mm, then turn the screw clockwise to move the derailleur cage inwards.
Another solution you can use even if the screws set correctly you can while standing push hard on the pedals and back off while pedaling to shift between the chainrings.
Alternatively, if it persists slipping off from the inside, you can use a chain catcher as well. The device works like an arm to prevent it from over shifting inwards, helping to fix the chain.
How to avoid it
When you find the chain coming off on the rear, you also need to make a simple adjustment of the limit screws on the rear derailleur. Check if the chain is slipping off on the rear derailleur cassette in the inside. Place the chain onto the front smaller chainring with the larger gear found at the rear.
Turn the low screw in a clockwise position until the derailleur cage the section hanging down moves away from the middle of the bike.
Move it to a point where the chain moves freely into the larger sprocket and can go no further. If the chain comes off on the outside of the cassette, place it onto the larger chain ring with the smaller rear gear.
Turn the high screw clockwise until the cage starts moving towards the middle of the bike. Move it until it moves freely into the small gear and goes no further.
However, if this has never happened before, check if your rear wheel sits correctly in the dropouts. Make sure the rim runs centrally in the chainstays.
Also, make sure the rear derailleur cage with the hanger the piece on which the derailleurs bottled is not bent.
The pulley of the rear derailleur needs lining correctly underneath each other.
What if the steps above don’t work?
If you have followed the tips for fixing the front and rear derailleur screws for the chain and it still comes off you can look for the following:
The front derailleur may have moved, so check the position!
Check if the derailleur moved by looking at the lower edge of the cage and the top section of the outer chainring. It should be about 3mm.
Also, check the alignment of the cage if you have a direct mount; it automatically lines to the frame and appears square. However, with a band clamp derailleur, it needs to be in line with the middle line on the chain ring.
You will need a band clamp and barrel adjuster to fix the problem if the cage has moved. Move the chain over the chainring to make sure it is correct and make adjustments with a band clamp where needed.
You will have to release the cable tension by turning the barrel adjuster clockwise to get slack in the system. Then turn the barrel adjuster anti-clockwise to give leeway in both directions. Then apply the same method as described in setting the screws for the front derailleur to fix the inner and outer limit.
Now reset the overall chain tension of the cable at the cable anchor point with a cable puller to make fine adjustments making sure the tension is correct. Once adjusting, you can set the cable tension and give the front cranks a turn to operate the front shifter.
Other possible problems:
- Maybe the drivetrain is worn and needs replacing as the shifting performance starts to become less smooth.
- On the other hand, the chain may be worn out or have a bent or stiff link. Sometimes the chain can be clogged with dirt. The chainring or tooth may be bent and needs a visual check.
- Check if you are running the chain at an extreme angle as sometimes the largest chainring runs into the larger gear and vice versa with a small chain ring running into the smallest gear.
- There is a chance the chain length is not right—you can do this by putting the thread into the largest chain ring and largest sprocket without running it through the rear derailleur. Now pull the two ends together and add another complete link one inner and one outer half-link to get the correct length.
- You are using a chain not compatible with the drivetrain and need to change it, or one of the chain ring tooth is damaged.
- Alternatively, the jockey wheel can also be damaged and needs replacing with a new one.
Final thoughts
We hope that the info provides you with helpful information to fix your chain quickly. However, if not all of the above works and the chain continues to slip, check the chain or cogs as it may be worn out.
On the other hand, if you are thinking about how to tighten a chain, it all depends on the type of bike you have. You can fix it with a derailleur, but if you do not have the right tools, it is best to have it fixed by a professional.
If all else fails, you may have to face the reality that a bike chain will only last a certain amount of time before it will need to be replaced. You can have a local bike shop mechanic check it out for you and have it replaced.
Sources:
https://www.express.co.uk/sport/othersport/1283734/Bike-chain-how-to-fix-your-bike-chain
https://www.halfords.com/bikes/how-to-guides/how-to-replace-a-bike-chain.html
Check out related posts on this site:
